
Infrared photography
Infrared photography, when and how to use it? In the last few posts of this blog we have learned about some well known techniques of modern photography such as motion blur or high speed photography. We did it from time to time knowing the basics of these techniques and looking, relying on Google Images, some of the most beautiful photos taken by third-party photographers in the rest of the world. Today we will try to do the same by talking about infrared photography.
What is infrared photography
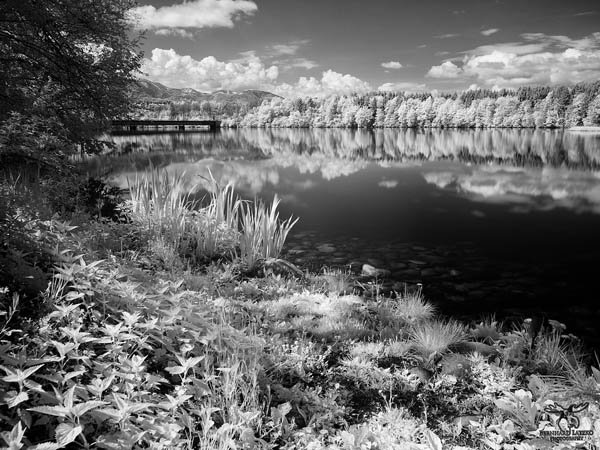
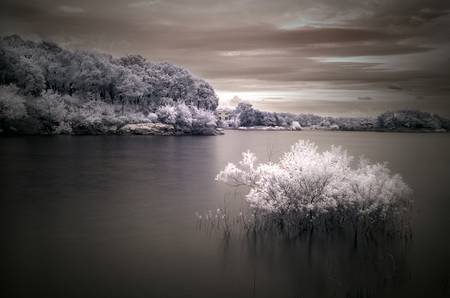
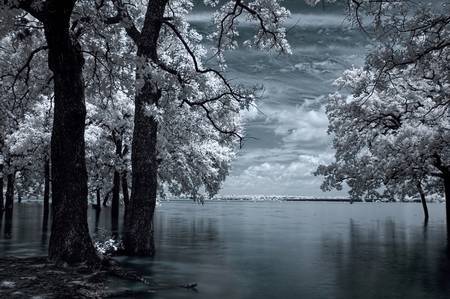
When we talk about infrared photography we mean that particular photographic technique in which the sensor used is calibrated so as to be sensitive to infrared light only, that is that part of light (not visible to the human eye) that travels on the wavelengths that range from 70nm to 90nmn. It is not a simple to implement technique as it requires the use of particular filters that blocking a large part of the visible spectrum (ie visible light) allows only certain frequencies of light to pass, namely those of infrared.
When using infrared photography
It is possible to divide the main cases into two in which the use of infrared photography is required. One is that of medicine. In medicine, infrared photos are useful because light with the aforementioned wavelengths is able to overcome, for example, the barrier of our skin or our gums. Thanks to these particular refractive properties of these fabrics, it is possible to take infrared photos that can “overcome” the outside of our body and photograph the inside to detect any problems or malformations. A second area in which infrared photography is widely used is that of nature photography. For example, imagine those who make night documentaries in environments such as the Savannah and the Jungle and need to shoot subjects, such as nocturnal predators, which are visible only in complete absence of light. With infrared cameras or cameras it is possible, and thanks to this technique it has been possible to produce documentaries that have explained to us how these animals live when the daylight goes away.

What you need to take infrared photos
Basically, only two elements are needed to take infrared photography: DSLR and an infrared filter. Of the latter you can find galore on the market and they cost a few tens of euros. Good news therefore for those interested in experimenting with this technique. The only attention I suggest you do is the level of “fit” of the filter you plan to buy with respect to the lens of your camera. Make sure that the closure, whether interlocking or screwing, is absolutely watertight as they say. In fact, the slightest glimmer of natural light must not pass, which otherwise would invalidate the photographic effect you want to create.
How to take an infrared photograph
Let’s start with the ISO, which must be kept as low as possible, I would say between 200 and 400 maximum and set the shooting mode to Raw. Always use a tripod with remote release or self-timer triggers. Keep a focal aperture at about f / 8 for maximum sharpness. Bracketing: to be set to +/- 1 EV. Finally, adjust your camera settings to make sure you get a good exposure while keeping noise to a minimum.